

Understitching
Mastering Understitching: The Secret Sauce for Superstar Sewing
Ever peeked at the edges of shop-bought clothes and thought, “Why do my homemade makes look a bit… wobbly?” Meet your new bestie: **understitching**! It’s not the diva of the sewing world (no sequins or confetti), but oh boy, does it make your creations look like they just sashayed off the rails at Selfridges. Ready for the glow-up? Bobbin on—let’s stitch through it!
What Even Is Understitching?
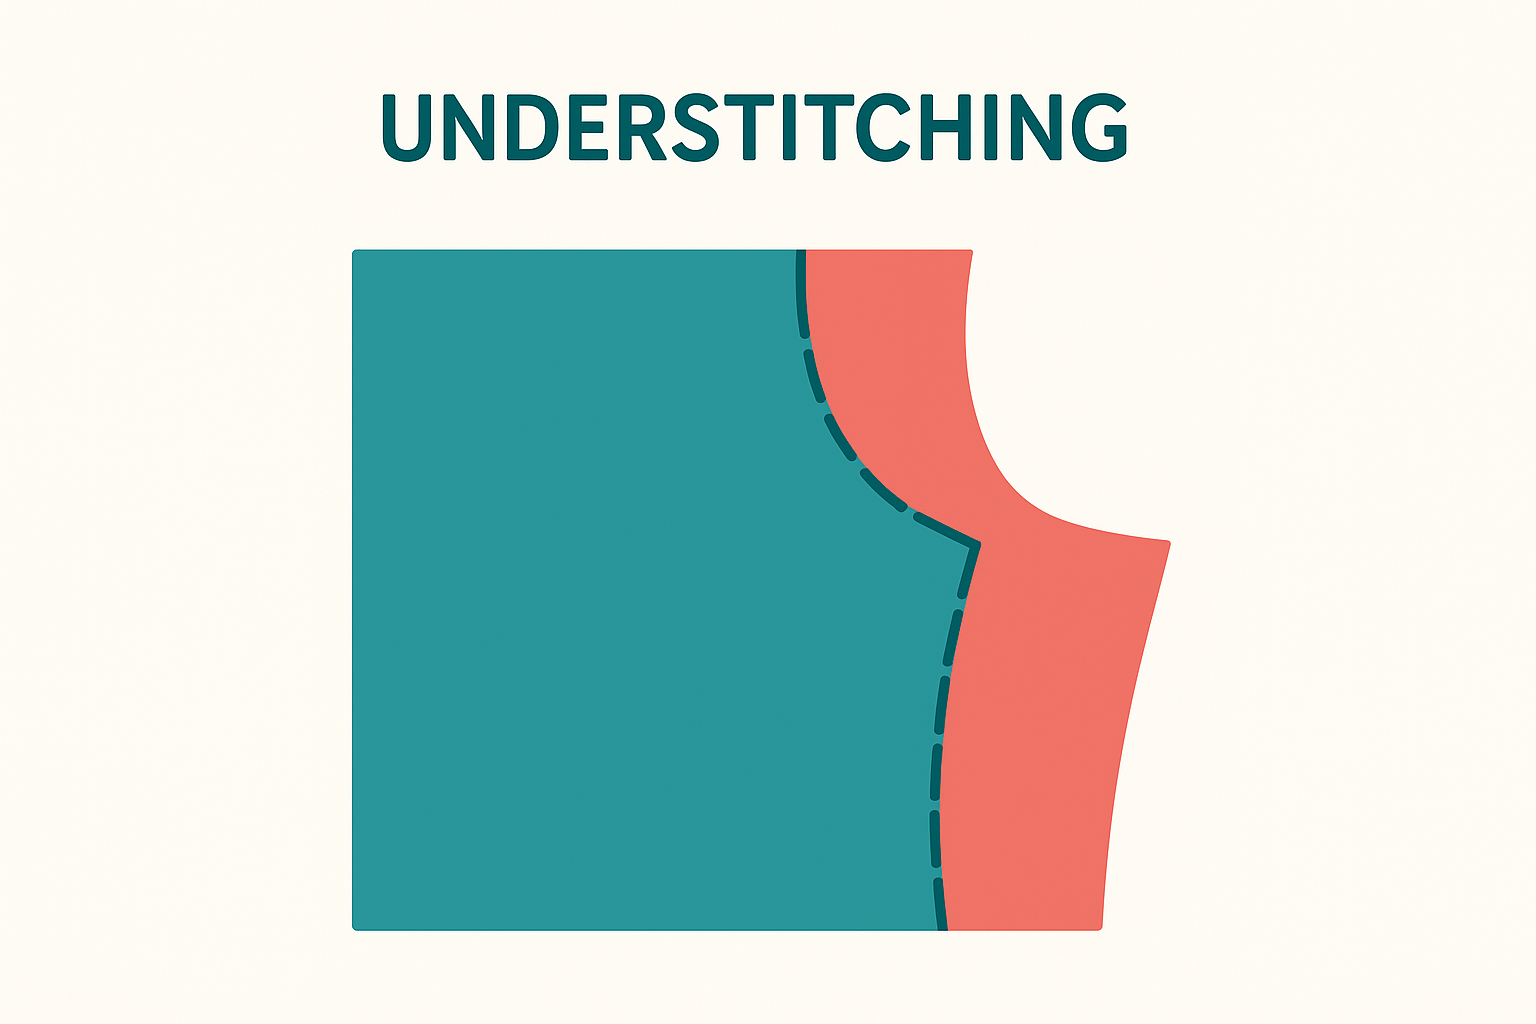
Understitching is like your garment’s quiet bodyguard—stitching right near the edge, hand-in-hand with your facing or lining, hiding in plain sight just inside the garment. The result? No cheeky facings peeking out and armholes/necklines behaving themselves.
Think of it as the Wonderbra of sewing finishes: invisible but oh-so-supportive!
Why Should You Bother? (Trust Me, You Should!)
Let’s thread the needle—here’s why you need this step in your sewing life:
- Keeps Stuff Tidy: Facings and linings stay tucked inside where they belong (nobody likes a wardrobe malfunction).
- Super Strength: Collars and waistbands get reinforcement that can handle the daily hustle.
- Ooh La La Finish: Hello, high street look! Goodbye, homemade “meh.”
- Less Iron, More Sewing: Once understitched, your edges behave. Less pressing. More sewing. Win!
Perfect Times to Understitch
- Necklines: no more facings on the loose!
- Armholes: Especially if you hate sleeve drama
- Waistbands: Keep your lining from staging a jailbreak
- Facings: Whenever you want your “insides” to stay incognito
How to Understitch (The Fun Bit!)
- Sew the seam: Marry your garment fabric and facing (or lining)
- Press Party: Press that seam allowance towards the facing/lining. Don’t skip! (Your iron is the fairy godparent in this story.) Give those seams a proper press. A crisp seam is a happy seam.
- Understitch Time: On the facing/lining side, run a tidy line of stitches about ⅛" (3mm) from the seam. Remember: Only catch the seam allowance and facing/lining. No main fabric allowed. Facings only on this guest list!
- Press Again (Yes, Again!): Roll the facing/lining in. Give it a final press. Admire your work. Sip tea. Brag as needed.
Quick Tips So You’ll Look (And Feel) Like A Pro
- Foot Fetish: Edge-stitch or zipper foot = maximum control, minimum wobbles
- Stay on Track: Because these stitches live near the edge, neatness counts—keep it smooth so only you know it’s there
- Press Like You Mean It: “Press after every step,” said every sewing wizard ever. Turns out, they’re right
- Fashion Rebel?** Love a bit of visible stitching? Swap understitching for topstitching and give your project some extra pizzazz
Tools I Actually Love
If you don't have them already... here are links to the zipper fee:
Edge foot
(for use with 1/4" quilting too!)
As an Amazon Associate, I may earn a small commission from qualifying purchases—but I only recommend products I’ve tried and genuinely love in my own sewing journey.
Sew, What Next?
Understitching isn’t just a “nice-to-have”—it’s the magic that takes your handmade from “home ec” to head-turning. No more sad, floppy necklines. No more mystery lumps. Just tidy, professional edges—and major “You made that?!” moments from your friends.Ready to level up? Join one of my workshops in Milton Keynes, or sign up for sewing goodies, blog updates, and crafty cheekiness below. Because sewing is better, braver, and bloomingly fun—together.
Stay sew fabulous, and see you at the machine!
Want first dibs on our latest blogs, tips, and all things stitchy?
Want to be the first to know when our latest blogs go live? Pop your details in below and we’ll send a little sewing inspiration straight to your inbox as soon as it’s hot off the (virtual) press. Stay in the loop—never miss a stitch!
To get the regular sew down!